|
|
Last Updated: 10th May, 2014 |
|||
1.1) The Essential Parameters for Correct Exposure.In this lesson we are going to explore 3 important parameters or settings that a person can use, to control the exposure of a photograph. Let us study the following examples,
The photo on the left is considered under exposed. The picture looks dark. This can happen if photo is taken in a room that is not well lit. The photo on the right is consider over exposed. The picture is bright and washed out. This can happen when a photo is taken in a environment that is too bright. Like, under the sun. The above photos were not taken in Auto mode. They were taken with Manual mode instead. Both photos were taken with the same camera settings. But one with the light turned off, the other with light turned on.
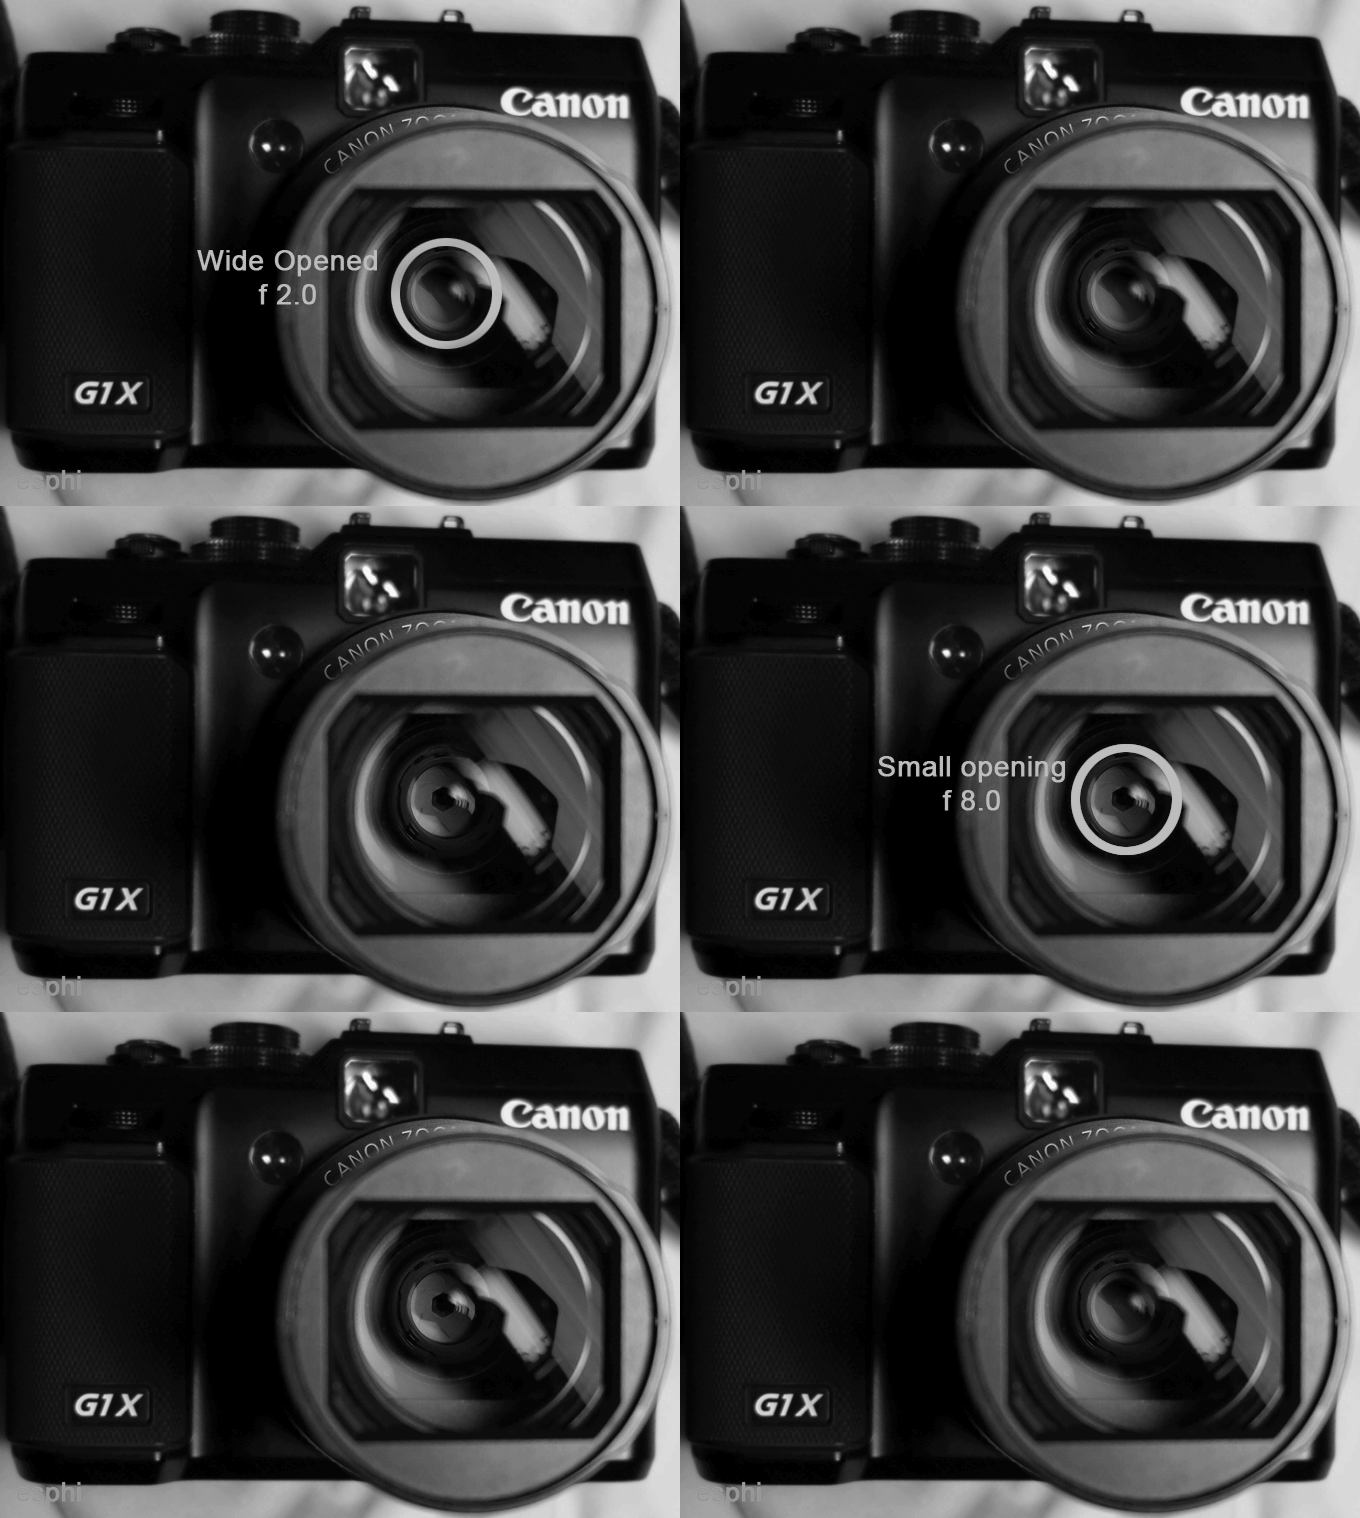
The above photos show correct exposure. This is what happen when the camera is switched to Auto Mode, thus, is allowed to make correct adjustment to the setting to the previously mentioned lighting condition. Normally, a camera can make good adjustment to different lighting condition. Whether it is bright under the sun, or in a room where it is darker. The camera does it by adjusting the following parameters or setting, Quiz 1.1Answers 1.11. 2) Aperture SizeAperture is an opening inside the lens, somewhere along the light passage. Its function is to restrict the amount of light that passes through the lens. It can vary in size of its opening, thus, control the amount of light that passes through, just like a tap on your kitchen sink. You can control the rate of light traveling through the lens just like you would control the rate of water flow out from the tap. To increase the water flow, you would open the the valve wider. To reduce the water flow, you turn back a little on the tap. (For the men) Or like a window blind, or curtain, you can open it to let in all light, or close it partially to darken the room. (For the ladies) Similarly, you can control the amount of light passing through the lens by opening up the Aperture, or narrow down the Apertureâs opening to reduce the amount of light passing through. You can see the aperture works if you look into the lens of some of the cameras while it is operating.
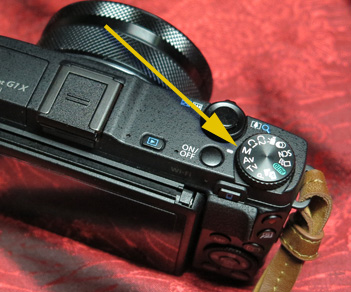
Assignment 1.1The following Assignment require you to set up the camera before you start taking photo. Please follow the procedures to set up your camera. At this stage you may not understand the functions of each dial or buttons, if you find it difficult to comprehend at this moment, skip the explanation and just follow the instructions to set up the camera. Explanation:The following set up will turn the Camera from Auto Mode to Manual mode. We will Fix the ISO and Shutter Speed of the camera so that you will focus your attention to the Aperture. With this Assignment, you will get an idea how Aperture work to control the exposure of a photo. Instruction to set up the camera:1) Turn On your camera. 2) Turn the Mode dial to M, which mean Manual Mode.
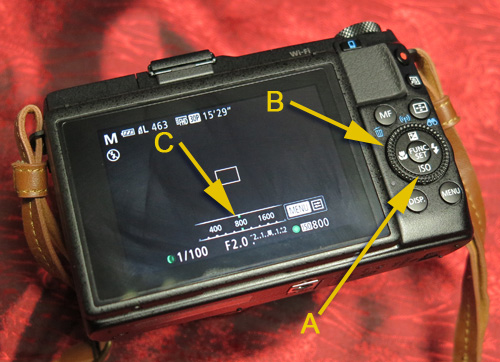
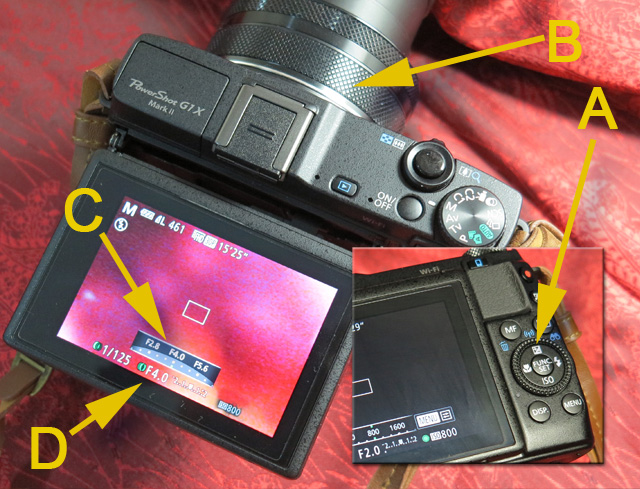
3) Set ISO to 800. If you are using a Canon G1X Mark ii, Press the ISO button (A), then turn the dial (B), set ISO to 800 (C).
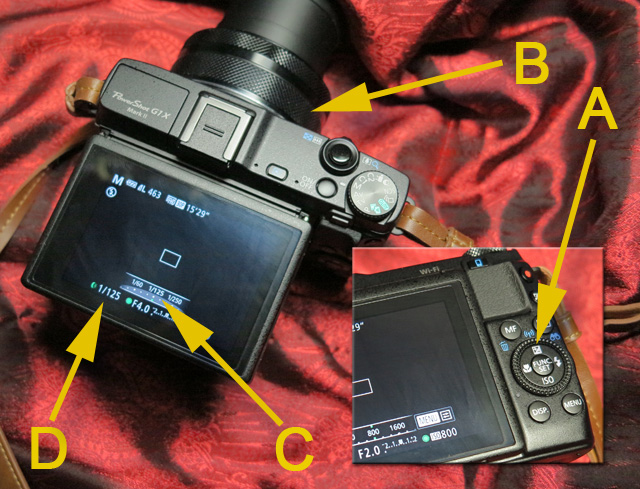
4) Set Shutter speed to 1/125. If you are using Canon G1X Mark ii, Press (A) until you find figures in Fractions, like (C) shows up on the LCD display, then, turn ring (B), until you get 1/125. Check on (D), to see if you have the correct setting. (Please note that G1x Mark ii is a very flexible camera. It allows you to customize most of the Ring, Dials, and Buttons to different functions, for your convenience. If you have gotten yourself a second hand unit, you may want to reset the camera to the factory default. And then, start your own customization as you go along and know the camera and your needs better.)
If you are using Canon G1X Mark ii, Press (A) until you find figure preceded with a F as shown in (C) on the LCD display, then, turn ring (B), until you get F4.0. Check on (D), to see if you have the correct setting.
6) Set your focal length to the widest, and keep it there. If you are using Canon G1X Mark ii, turn the zoom button to the left, the widest focal is 24mm. For this assignment, do not âZoomâ to compose your picture. Walk, make a few step back and forth if you need, to compose your photo. (Not many compact camera provide a zoom that starts with a wide 24mm, less with F2.0 lens. G1x Mark ii has both, and most of all, the lens perform exceptionally well from the widest 24mm to 120mm.)
Now that you have set up your camera. Follow the rest of the instruction to finish the assignment. Part a.1) Bring the camera outside the house, or, shoot through an opened window and take a photo of your neighborhood. 2) Take a look at the photos you have just taken and make notes on what you see. Is the photo over exposed or under exposed? If this is day time, most likely you will see an over exposed photo with the above setting. That mean too much light has passed through the lens and landed on the sensor. Recalling what we have learnt from the kitchen Tap analogy, we can, turn down the aperture, just like you would turn down the tap, to restrict the amount of light that pass through the lens. 3) Turn the Aperture dial, try the following, f5.6, f8.0, f11. and take one photo of the same subject, for each of the setting. That is one photo at f5.6, one at f8.0, and one more at f11.0. If you have forgotten how to set the Aperture, go back to Step 5 on the instructions to prepare your camera. Instead of f4.0, dial in f5.6 and etc. Now you see, the photos you have taken are progressively darker. Take note on the relation of the f number and the result of exposure. You will notice that the larger the f number, the less light can pass through and the darker the photo. Try to remember the relation. Part b.1) Bring the camera back in the house and take a photos of your sofa. 2) Take a look at the photos. Immediately, you will notice the photo is dark. The photo is under exposed. 3) Turn the aperture dial back a little, take pictures at f11, f8, f5.6, f4 and f2 once again, if you forgot how to set the aperture, refer to Step 5, but dial in f8 and then progressively to f2 as you take your shot for each of the setting. Now you see the photos you have taken are progressively brighter. take note on the relation of Aperture and the exposure. Part c.1) Find an interesting subject, inside or out side the house. 2) Take a photo. 3) Have a look at the photo and try to adjust the aperture to get a correct exposure this time, take another photo. Keep trying until you get one that is correctly exposed. Part d.1) With the camera set up, find a subject 2) Try guessing and set the aperture before taking the photo. 3) Have a look at the photo and try to adjust the aperture to capture correct exposure.
Summery 1.1aBy now, you should have a clear understanding how Aperture affects the exposure given a same and fixed Shutter speed and Sensor Sensitivity. Aperture size is given a number preceded with a âfâ. f8.0 is wider than f16.0, and f2.0 is even wider. Hence, The smaller the f-number, the larger the aperture opening, thus allow more light to pass through the lens.
Continue to Lesson 1b
|
|
[Home] [For Beginners] [Lesson 1a] [Lesson 1b] [For Hana] [About this site] |
|
esphi |


